Skip to content
 Shower Pan Repair in Lexington, Massachusetts
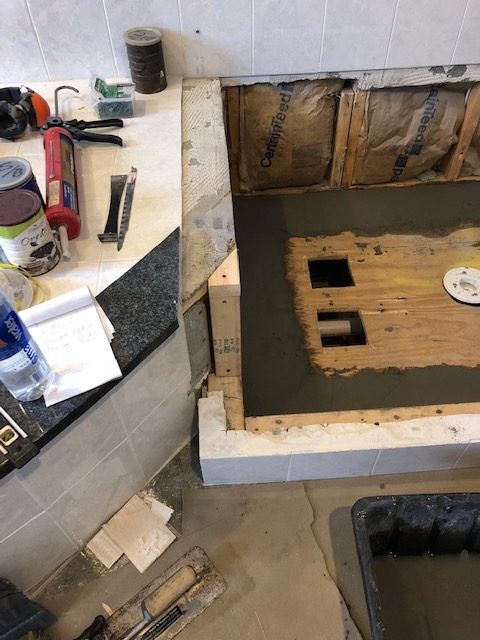
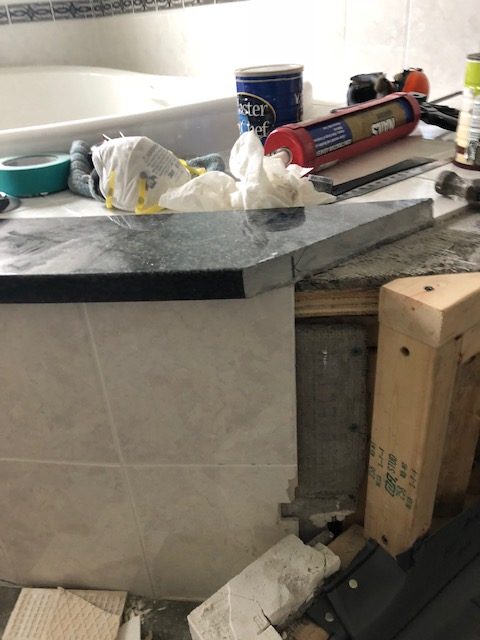
I had a service call in Lexington, Massachusetts regarding a challenging Shower Pan Repair. I had to pull out the glass shower walls and remove the two rows of tile down to the floor.
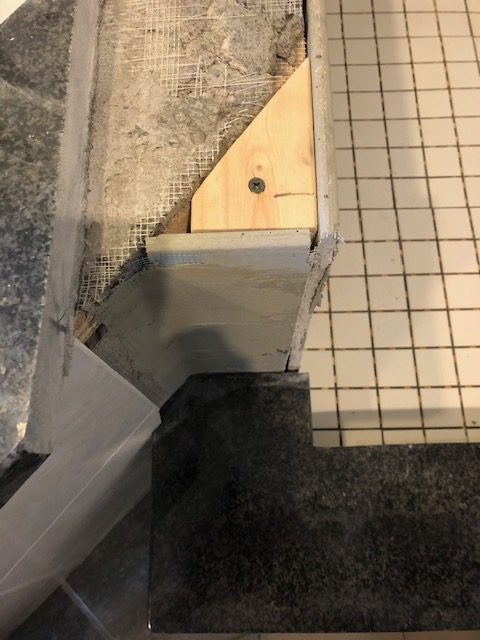
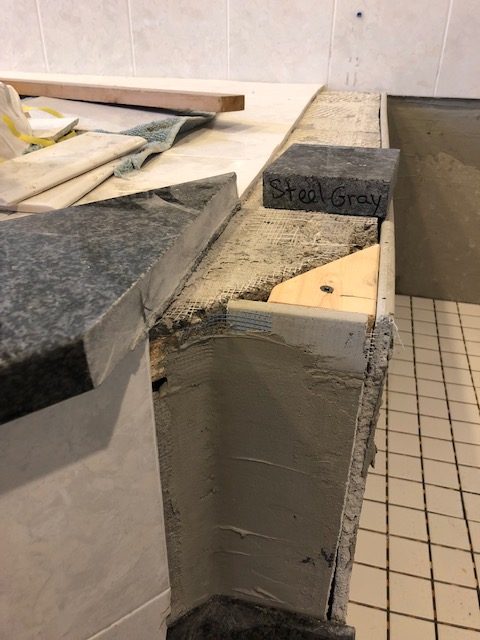
The tricky problem with this repair was I had to remove a tiled seat that came into the shower stall which was part of the tub surround tile and Granite curb.
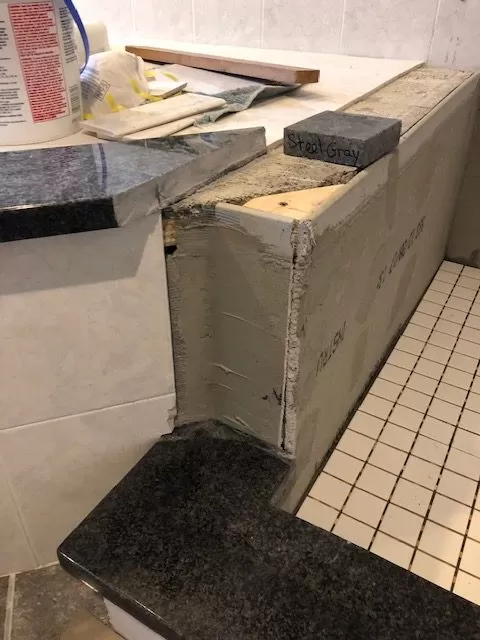
This tile, stone and framing had to be removed for me to remove the copper pan which was leaking.
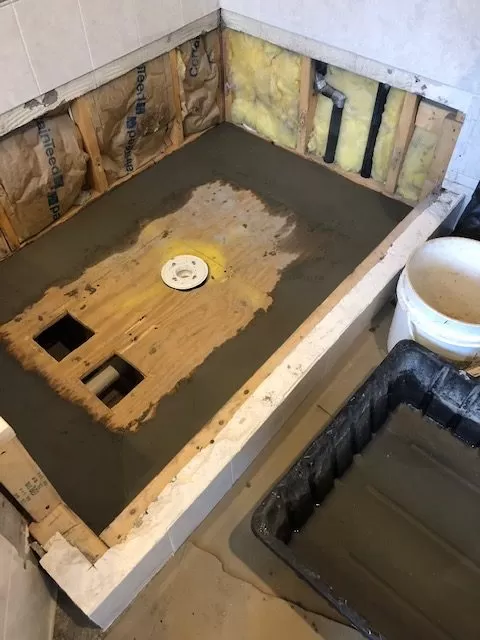
Challenge of Matching the existing Tile.
The other challenging factor was going to be able to match the existing tile. Not only in color but size. Tile after 10 years can be discontinued as well as changed in overall size.
Fortunately I was able to find the correct size tile but not the correct color.
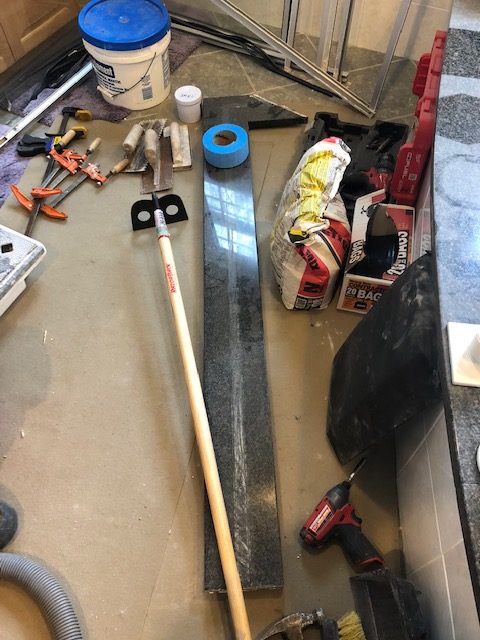
Tricky Alterations.
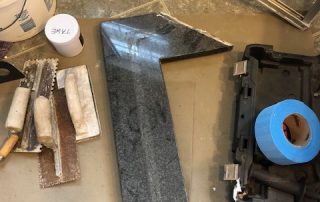
Another tricky alteration was cutting the Granite curb in place to accept the new finish curb on the tub top surface.
Matching the granite was a bit tricky but we were able to reuse the curb cap and we matched the top deck cap almost perfectly.
We, at My Dear Watson are only a phone call away.
So click www.4mywatson.com or call us today at 978-251-2994!
We are always here to help.
Can you replace a Shower Pan without Replacing the Walls?
Replacing a shower pan without replacing the walls is possible and can be done with a few do-it-yourself (DIY) steps. First, remove the existing fiberglass shower pan, which can be done by unscrewing the screws that hold it in place and lifting it out. Next, use a repair kit to repair any cracks or damage on the walls. Once completed, you’ll need a new fiberglass shower pan to replace the old one. This can be found in most home improvement stores and comes in several sizes and shapes to fit your exact needs. After putting in the new fiberglass shower pan, seal the edges with caulking before putting tile on it or refinishing it with acrylic or another material. Finally, use a shower repair kit to make sure that everything is properly sealed and waterproofed before using your newly installed shower pan. With these simple steps, you can easily replace a shower pan without having to replace the walls!
Do Plumbers Fix Shower Pans?
Yes, plumbers do fix shower pans. Depending on the type of shower floor, a plumber may either have to repair a cracked shower, repair a fiberglass shower floor, or use an epoxy-based shower pan repair kit. To repair a cracked shower, the plumber will need to fill the crack with filler and then inlay it with epoxy. For repairing a fiberglass shower floor, the plumber may need to use an epoxy-based patch. If you’re looking for a more complete replacement, your plumber can also replace your old tub and install a new shower base. In addition to these repairs and replacements, plumbers can also use special tub repair products to fix small dents and scratches. Finally, if you need help with any kind of crack repair or patching of the shower pan itself, your local plumbing company should be able to assist you with this as well.
Can a Crack in a Shower Tray be Repaired?
Cracks in a shower tray can be repaired, though it is not always an easy task. Depending on the type of shower you have, you may need to either replace or repair your shower pan. Shower pans are usually made from porcelain, acrylic, or fiberglass and can require different methods for repair. If you have a bathtub that serves as a shower floor, you’ll need to remove it in order to repair the crack properly. Once the old concrete is removed, you can use foam and fiberglass mesh along with resin and sandpaper to fill in the crack. For an acrylic shower pan, sanding down the crack will help smooth out any jagged edges before filling in the area with resin. Or if necessary, replacing the entire shower pan may be required. Regardless of your method of repair, careful attention must be paid when repairing cracks in a shower tray in order to ensure that it remains safe for use.
How Much does Replacing a Shower Pan Cost?
The cost of replacing a shower pan varies depending on the type of material and the extent of the damage. If there are cracks and chips in the existing shower floor, it may be possible to repair it without having to replace the entire shower. Bathtub repair companies may be able to repair these cracks or holes with a special coating, but this is usually not the best option as a lack of support can cause further damage down the road. Replacing the entire shower with either fiberglass or acrylic is usually the best option if there’s a hole or crack that can’t be repaired. Depending on the size, quality of materials, labor costs, and other factors, replacing a shower pan can cost anywhere from $500 to several thousand dollars.
How do you Remove an Existing Shower Pan?
Removing an existing shower pan can be a daunting task, but with a few basic tools and some patience, it can be done. First, you’ll need to repair any water damage that may have occurred in the shower floor before replacing the pan. Using a durable material such as glass fibers is a good way to keep the water away from dust and debris, and avoid using any materials that could potentially cause more damage. After everything is set, it’s best to leave it for two to three hours before starting the replacement process. Once all of the old pan is removed, you’ll want to fill in any cracks or pits with something like cement before refinishing it. With these steps taken care of, your shower pan should be ready for installation!
What to do if your Shower Pan is leaking?
If your shower pan is leaking, it’s time for a shower floor repair. Start by replacing the shower pan. Use a vacuum cleaner to suck away the dust, then set aside two to three days for this project. If you notice any cracks or pits, they should be filled in before refinishing. Make sure you have everything you need to complete the job including the mixing of the resin. Follow the directions carefully and use a putty knife or rubber spatula to fill in all cracks and pits before adding layers of resin. When done correctly, you can easily refinish and seal your new shower floor. With a little patience and some planning, you can fix a leaky shower pan with little work.
Frequently Asked Questions
1. What is Shower Pan Repair?
Shower pan repair is a process used to repair or seal a shower pan. It typically involves using a special epoxy resin that is mixed with water and then applied over the damaged area. It is important to follow the instructions carefully when working with this type of material, as it can become quite difficult to work with if not done correctly. The resin should be set for two to three hours before it needs to be wiped off and dried. Once the resin has been applied, it needs to be allowed to cure for 24 hours before use. To mix the resin, you will need an equal amount of resin and water, and mix them together until they have formed a paste-like consistency. Once this is done, you can apply the paste directly to the damaged area and let it dry overnight before using your shower again.
2. How do I know when I need a shower pan repair?
It is important to know when it is time to repair a shower pan. One way to tell is by looking at the overall condition of the pan. If there are any cracks or chips, it may be time for a repair. Additionally, if the sealant around the edges of the pan has begun to deteriorate, this could also indicate that there may be an issue with the pan that needs to be addressed. Another sign is if the color or finish on the shower pan has become dull or chipped. In this case, it might need to be filled and refinished to get back to its original look and feel. Ultimately, if you see any signs of damage or deterioration with your shower pan, it is best to address these issues before they become more serious and costly.
3. What are the benefits of shower pan repair?
Shower pan repair can be a great way to save money and keep your bathroom in good condition. The benefit of shower pan repair is that it will help reduce the cost of replacing the entire shower system or having to replace the tiles and grout, which can become costly over time. Also, fixing the shower pan will help keep water damage from happening to your bathroom’s floor, walls, ceiling, and other surfaces. A fixed shower pan can also make the room look more modern and stylish. Finally, it can also help extend the life of your bathroom fixtures so you don’t have to replace them as often, saving you money in the long run. All in all, shower pan repair is an excellent way to ensure that your bathroom remains up-to-date and looks its best.
4. How much does shower pan repair cost?
Costs to fix a shower pan can vary a lot depending on how bad the damage is and what parts are needed. The cost of a basic shower pan repair can range from about $100 to $250 for the labor and materials, but more extensive repairs may cost more. If your shower pan is cracked, it may need to be replaced entirely, which could cost anywhere from $400 to $1,000 or even more. If you have tile in your shower, you may also need to pay for tile repair or replacement as well. However, if the damage is minor and just requires some patching or grout work, then it should cost much less. In the end, the best way to get an accurate estimate of how much it will cost to fix your shower pan is to talk to a professional.
5. What are the different types of shower pan repairs available?
Shower pan repairs vary depending on the type of damage. For minor cracking, patching is usually sufficient. The repair involves filling the cracks with waterproof sealant and letting it cure. This will keep the shower pan from getting worse and also make it look better. For larger cracks, a full replacement may be necessary. In this case, the old shower pan must be removed and replaced with a new one. Another option is to use an epoxy or fiberglass repair kit to fill in damaged areas and restore the structure of the shower pan. Finally, for more serious structural damage, a professional may need to be hired to inspect and provide advice as to what type of repair needs to be done. No matter which route is taken, it’s important to make sure that all repairs are done properly in order to ensure a long-lasting solution for your shower pan.
6. What materials are used in shower pan repairs?
Most of the time, fixing a shower pan means fixing or replacing the drain, which is the most important part of the shower’s drainage system. To do this, plumbers may need to use a wide variety of materials, depending on the repair. These materials usually include PVC pipes and fittings, brass nuts, washers, screws, and bolts, rubber seals, adhesive caulk, and silicone sealant. PVC pipes are used to connect the drain to the main drainage system in the wall or floor. Brass nuts and washers are then used to secure the drain in place. Rubber seals are usually needed to make sure that the different parts of a drain assembly are watertight. Lastly, adhesive caulk and silicone sealant are often used to make the base of a shower pan or bathtub surround even more waterproof. With these materials, plumbers can easily repair shower pans or replace them with new ones if necessary.
7. Is shower pan repair a DIY project?
Shower pan repair can be a do-it-yourself (DIY) project for some homeowners. This type of repair involves replacing the shower pan, which is the base of the shower area. It is important to have the right tools and supplies on hand to complete the job properly. Depending on the extent of damage, it may be possible to simply replace a few parts of the pan or seal cracks in it. Additionally, it is important to make sure that all components are properly installed and sealed so that water does not leak out of the shower area. For those who are unfamiliar with plumbing and repairs, however, it may be a better idea to contact a professional plumber or contractor for help with this task.
8. What to do in a shower pan repair emergency?
In the event of a shower pan repair emergency, it is important to take immediate action in order to avoid further damage. First, turn off the water supply and drain the shower if possible. Next, assess the damage by carefully examining the affected area. Find replacement parts at a hardware store or plumbing supply shop if any of the parts are broken or missing. Once all the necessary parts have been found, use pliers and other tools to remove any damaged pieces before installing the new ones. Finally, seal up any gaps with waterproof caulk and reinstall the shower pan. With these steps completed, your shower should be good as new!
9. How often should I have my shower pan repaired?
Shower pans should be inspected and repaired on an annual basis. This is especially important if you live in an area with hard water, as the minerals in the water can corrode metal pipes, leading to leaks and other damage. If your shower pan appears to be leaking or if it has been more than a year since you had it inspected, it’s best to call a professional plumber right away to assess the situation and repair any damage. Additionally, if you’re planning any home renovations, such as adding new tile or replacing the drain system, it’s also wise to have your shower pan inspected and professionally repaired at that time. Regular maintenance and inspection of your shower pan are keys to keeping it functional for years to come.
10. Are there any special instructions for shower pan repair?
When it comes to shower pan repair, there are a few special instructions you should keep in mind. First, it’s important to make sure that the area is completely clean and free of any dirt or debris before beginning the repair process. You’ll also want to check for any signs of mold or mildew and address them as necessary. Additionally, make sure that you use the appropriate sealant for your particular shower pan; this will ensure a long-lasting fix. Finally, it’s important to let the sealant cure completely before using the shower again. Following these simple steps can help ensure a successful repair job and keep your shower pan looking great for years to come!
Table of Content